Additionally, if money is tight, which it is for a lot of us, does it really make sense to splash out more money on a dress you don’t really need, because you have 30 others hanging up in your wardrobe. Wouldn’t that money be put to better use by saving for a fabulous holiday, so you can rock your already extensive wardrobe in another destination.
Instead, why not go for the space saving and money saving option and update your current outfits with some clever accessories.
Hair Hotness
You would be amazed how a well chosen hair accessory can totally transform a look. An oversized bow will give a great retro appeal to any outfit; a floral headband can create a Bohemian feel; a jewelled number will add some serious glamour; and a cute pair of cat’s ears can transform any lady into a Harajuku girl that wouldn’t be out of place on the streets of Japan.

Hair Hotness: 1) Blue Gem Stone Hair Crown, River Island; 2) Ruffle Hair Turban, ASOS; 3) Feather Drop Headband, Miss Selfridge; 4) Cream Flowers Aliceband, Topshop; 5) Hair Decoration ,H&M; 6) Hawaii Print Headband ;ASOS.
Nail Art
Your nails may be small, but they are a canvas that should be utilised at every opportunity. A bright shade can give a much needed pop of colour to an outfit of muted tones and a pastel shade can give a relaxed summer vibe. Those of us who are a little more daring, can go for some outrageous nail art, either created by hand or by using some fabulous falsies can make any ensemble feel brand new.
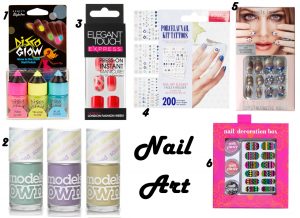
Nail Art: 1) Disco Glow Nail Varnish Set,Topshop; 2) Fruit Pastel Polishes,Models Own; 3) Express Peach Ombre Press On Nails,Elegant Touch; 4) Bourjois ASOS Exclusive Nail Tattoo Kit,ASOS; 5) Nails Inc Bling It On Swarovski Crystaltastic Nails,ASOS; 6) Nail Decoration Box,H&M.
Leg Candy
Yes the weather is getting warmer, so I am not suggesting you wrap you legs in 200 denier tights, just to get a slightly different look to your outfit. I’m talking about some serious leg decoration like some delicate lace leggings to give a ‘Little House on the Prairie’ appeal, or some funky decorated tights to add some edge. You may have also noticed that socks have seen a surge in popularity in recent months, with little frilled angle socks adding some school girl chic to any look.
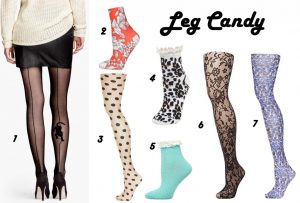
Leg Candy: 1) Patterned Tights, H&M; 2) Red Sketch Floral Pop Socks, Topshop; 3) Nude Big Polka Dot Tights, Topshop; 4) Leopard Frill Sock ,Miss Selfridge; 5) Aqua Contrast Lace Top Socks, Dorothy Perkins; 6) Oroblu Elizabeth Floral Lace Tight ,House of Fraser; 7)Blue Floral Print Tights, Topshop.
Statement Neck Wear
A statement neck accessory can totally transform your current outfit – for example an oversized pussy bow can add some geek chic or a big embellished necklace can add a touch of glamour. Be sure to check out the likes of Etsy for some fabulous detachable collars and neck pieces from talented crafters – they will really change the whole look of an outfit.
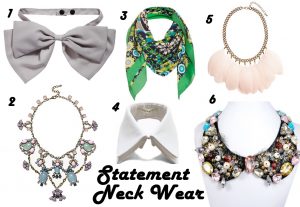
Statement Neck Wear: 1) Bow Tie, ASOS; 2) Pink Jewel Embellished Statement Necklace, River Island; 3) Morrocan Tile Print Scarf, Topshop; 4) Double Detachable Collar, Etsy; 5) Necklace With Feathers, H&M; 6) Sparkly Multi Rhinestone Peter Pan Collar Necklace, Etsy.
Huge Clutch
Handbags are much easier to store than clothing – they take up less space an you don’t have to worry about getting them creased. You will be amazed how much an oversized clutch can completely change the look of a whole outfit. It takes a classic jeans and T-shirt ensemble from day to night and can add a burst of colour and style to a rather plain outfit.
Treat Your Nails Like A Canvas With Elegant Touch.
If you are a strict follower of the trends like I am, you will know that nail art is a key beauty trend for Spring/Summer 2014. If you want to be on-trend and In Vogue, then a single nail shade is not going to cut the mustard – the more outrageous the nail art, the better.
Being a total fiend for colour at the minute, be it pastels or neon brights, I obviously love crazy nail art, but the chances of me being able to create anything like it with just a few bottles of nail varnish and my own hand is miracle territory. I’m limited to a single shade, and even then it can look like I have applied it blindfolded since I have very shaky hands and a low level of patience. Then you get one chip and the whole look is ruined – there must be something better.
I want something that that is easy and quick, but still has a high impact – I want other girls to eye my finger candy with jealousy. Step up Elegant Touch – for the second season they have teamed up with super hip design house, House of Holland to create a seriously fun, yet fashion forward collection of women’s false nails.

House of Holland For Elegant Touch: 1) Geek Chic; 2) To Dye For; 3) Heartbreaker.
Creative Director of House of Holland, Henry Holland was inspired by the London-girl aesthetic and her cool and confident attitude. The collection features some of the most outrageous and colourful nails I have ever seen, with like likes of Lego blocks and photographic prints. Holland says: “This nail collection is about not taking fashion too seriously – making a statement and having fun doing it.”
So do Elegant Touch and House of Holland have the answer to my nail art prayers?
Getting Nailed By Elegant Touch
I have to say I was nervous about applying the House of Holland x Elegant Touch Nails as the length was longer than I have ever had before and as a false nail novice, I had never used false nails you had to glue on before. I had visions of sticking my fingers together and false nails stuck everywhere except my finger tips. But I really didn’t have anything to worry about – read on for more info…
Being the perfectionist I am, I like to have everything ready to hand so I can get the job done as efficiently and quickly as possible. So here is what you will need…
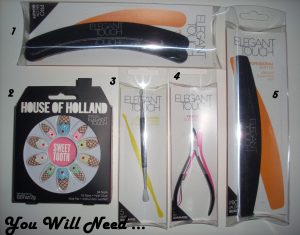
For The Elegant Touch Manicure: 1) Elegant Touch Professional Nail Files; 2) Your choice of House of Holland for Elegant Touch Nails – I went for the delicious Sweet Tooth; 3) Elegant Touch Cuticle Pusher & Nail Cleaner; 4) Elegant Touch Cuticle Nipper; 5) Elegant Touch Professional Nail Buffer.
Do the Ground Work…
You want to make sure you have the best possible surface to apply your false nails on, so that means taking some time to do a little bit of ground work. When applied correctly on properly prepared nails, these House of Holland lovelies can last for 10 days – how great is that?
- Remove any and all nail varnish from your nails thoroughly.
- Wash and soak hands in warm soapy water to soften the cuticles.
- Push back the cuticles into the nail bed with your Elegant Touch Professional Cuticle Pusher. Any cuticle excess can be trimmed with your Elegant Touch Professional Cuticle Trimmer (all Elegant Touch Professional nail tools are available at Boots, online and in store).
- Smooth away any ridges with your Elegant Touch Professional Buffer.
- File down the nails to a short length, using long strokes to prevent any splitting, with your Elegant Touch Professional Nail File.
Get Ready
Now you have a lovely smooth and healthy surface to apply your nails and have a great chance of having chip-free, super stylish nails for 10 whole days. Still, it is not time to dive right in and throw glue around yet, you still have a little bit of preparation to do…
- Open your House of Holland nails and read through the instructions – don’t just assume you know best, that is how you end up with fingers bonded together.
- Clean nails with with an acetone-based nail polish remover, to ensure that the nail is free from any moisture or natural oil that may affect the glue.
- There are 10 sizes available in total, so select the right size for each nail and lay out ready to use. The thinner end is the end that will sit closer to the cuticle – in this case the tasty ice cream will sit next to the cuticle.
Get Sticking…
So now it is time for the serious stuff – the applying of the nails. You really need to concentrate and be careful as the nail glue is super sticky and can bond skin in just a few seconds. If you do get your fingers stuck together, don’t force them apart or try to scrub it away with acetone or nail polish remover. Instead soak the affected area in warm water for ten minutes and prise apart gently. The Elegant Touch False Nail Remover will help to remove and dissolve any glue.
- Apply a thin and even layer of the nail glue onto the entire nail, immediately wiping away any that gets onto the cuticle.
- Hold the nail up to, but not touching the cuticle and apply the nail at a 45 degree angle from the cuticle.
- Press down lightly on the false nail for four seconds until bonded.
- The nail will bond fast very quickly so you don’t need to wait too long before you can file away any rough edges. A nail file is provided in the kit, but I prefer to use my Elegant Touch Professional File as it is bigger for my clumsy hands.
If you aren’t looking to wear the nails for up to 10 days, instead of applying the nails with glue, use some Elegant Touch Super Adhesive Tabs.
And Then Love…
Within around ten minutes you will have seriously fashion forward nails to make any girl jealous and there is nothing left to do but to love and enjoy them. Aren’t they just good enough to eat?
How Was The Trip To The House of Holland.
Yes, I was nervous about using nail glue for the first time, but I needn’t have been – the process was easy and quick and in the time it takes to wait for a single coat of nail varnish to dry, I had the outrageous nail art I was looking for. It may just be enough to convert me from nail varnish to false nails, especially for those special occasions, or just those days where you want to stand out from the crowd.
I have to say Elegant Touch have really brought out the big guns by teaming up with House of Holland – the stiletto shape nail feels so new and fresh, and with the extra length it adds a touch of glamour to those everyday looks. Although the length did take some time to get used to, once you have mastered fastening buttons with longer nails you can do it all.
I had a great weekend showing off my long nails, but sadly, I had to trim them down come Monday, when it was time to get back to the computer for work. They trimmed really easily with some good quality nail scissors and looked just as cute at the shorter length. It has now been four days of fabulous wear, with the nails feeling super secure and I have to say, I cant stop looking at them. With prices ranging from £7.99 to £8.99, you would be crazy not to give them a try.
I chose the Sweet Tooth nails as I just loved the quirky design and how the pastel shades are so on trend for Spring/Summer 2014, but the House of Holland collection is full of absolute beauties – check out some of my other must haves…
House of Holland for Elegant Touch: 1) Royal Explosion; 2) Block Heads; 3) Dotty; 4) Game Changer; 5) Glitter Face Ache; 6) Thorn In My Side.
Don’t forget to check out the new Elegant Touch Express Collection for more on trend nails, from neon brights to ladylike polka dots to classic French manicures with a twist.
I love all the fabulous nail art that has been featured on all the Spring/Summer 2014 catwalks, as well as all over the likes of Instagram and Tumblr from talented ladies creating their own nail art masterpieces. Instead of inspiring me, it just makes me feel jealous and angry, as I am diabolical at applying nail varnish – anything other than applying a single shade seems like witchcraft to me.
I am so shaky handed and have a lack of patience, as well as the short temper of a comic book villain that loses control with a little mistake with the nail varnish. The left hand usually goes fine, but when it comes to doing the right hand, I would probably get better results if I threw the bottle of nail varnish at it. Then after all that hard work, effort and concentration, one little knock and you have a chip in the polish – something I can’t stop noticing with increasing frustration.
So I have been considering experimenting with false nails for a while now, to get quick and effective results. Step on in Elegant Touch – their new Express Colletion, fronted by the stunning BBC Radio One presenter Jameela Jamil, is set to be the hottest piece of hand candy this coming season.

Perfect for us girls who want to look fabulous, but don’t want to take an age to do so, the new Elegant Touch Express collection comes in 24 styles, from classic neon, to polka dots to outrageous nail art designs. There really is a style for every mood and occasion that will have you tempted to ditch the nail varnish for good.
With prices starting at just £7.99, you can have a super polished manicure that can last up to 7 days, when applied correctly. So how are they to apply, are they really idiot (i.e. me) proof?
Instant Hotness – Applying Your Elegant Touch Express Nails
I’m someone who likes to be prepared and organised, so I find it easier to get everything out that I need, so I’m not rooting around for stuff at the crucial moment, so here is what you will need…
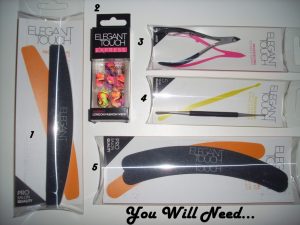
The Manicure Essentials: 1) Elegant Touch Professional Buffer; 2) You Choice of Express Nails, I Chose Bright Marble; 3) Elegant Touch Professional Cuticle Clipper; 4) Elegant Touch Professional Cuticle Pusher and Nail Cleaner; 5) Elegant Touch Professional Nail Files.
Now you have all the essentials sorted and within reach, it is time to get your nails all ready for their new look – the better the surface, the better the nails will adhere.
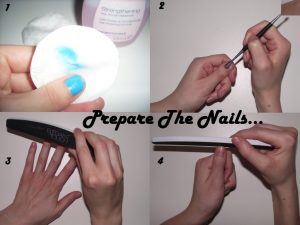
- Remove any mail varnish that may be left on your nails.
- Soak your hands in warm soapy water until the cuticles soften and using your cuticle pusher, push the cuticles into the nail bed. Any long cuticles can be cut away using your cuticle trimmer.
- Buff away any ridges with your Elegant Touch Professional Buffer for a nice smooth surface.
- With your nail file, smooth the tips of your nails to a short length using long strokes – smaller quick strokes can cause the nails to weaken and split, you don’t want that.
Now you have the perfect canvas you can create your work of art. Inside the Express Manicure kit you have all you need to create your masterpiece – Instruction leaflet, nail prep wipe, small nail file and 24 press-on nails in various sizes.

- Get out the instruction leaflet and give it a quick read – it’s better to not to assume you know best in these matters.
- Give your nails another clean with soapy water and dry thoroughly. Wipe your nails with the enclosed prep wipe; you have to prep your nails properly to keep them happy and healthy.
- Select the correct size press-on nail for each finger and lay out ready to use with the end of the seal of the sticky tab at the cuticle.
It is now time to go and get stuck in and apply the nails to your finger tips – it may be the nerve-wracking part, but if you follow the instructions it will be easy and pain free, I promise you.
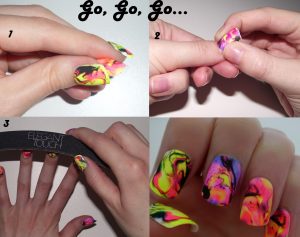
- Ensure the nails are the right way round with the thinner end sitting at the base of your natural nail near the cuticle.
- Peel of the protective film and place the press-on nail up to, but not touching the cuticle and apply at a 45 degree angle. To ensure it sticks strongly press firmly on the centre of the nail and then down each side. Repeat for all your nails.
- Using your professional Elegant Touch file, smooth away any rough edges, or file to a shorter length like I did, if you don’t like something too long. If you are going to file them, wait 30 minutes after application, you want to give them a chance to get comfortable before you start attacking them.
Now there is nothing left to do but enjoy them and show them off to anyone and everyone, like I did because I loved them so much. Don’t forget to pop some spares in your bag in case you do have a little accident and you lose one. If you can recover the nail , but it has lost a bit of it’s stickiness, you can use an Elegant Touch Super Adhesive Tab to bond it fast once again – clever stuff.
After washing your hands (stay away from water 30 minutes after applying) they glue may loosen, you can remedy this by drying them under a hair dryer on a low heat and press firmly to re-bond – simples.
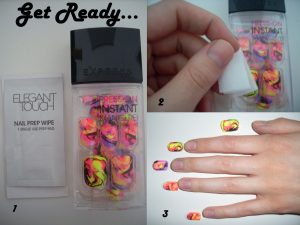
So How Was The Elegant Touch Experience?
Being a false nail virgin I was a little bit worried that it would be a disaster and I would have false nails permanently bonded to my hair or face. But, the whole process was incredibly simple and easy, and including all the prep time, was complete within 20 minutes.
The nails felt incredibly secure and there are no dangers of annoying nail varnish chips – they looked perfect all day long and I caught many a girl eyeing them enviously. When it came time to remove them, they came away without any pain or sticky residue.
So am I an Elegant Touch Express convert? Absolutely – nail varnish may be a thing of the past for me, check out some of my favourites from the new collection that I cant wait to get my hands (or nails) on…
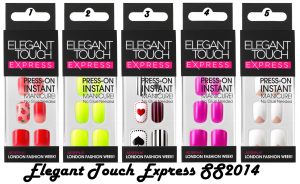
Elegant Touch Express Spring/Summer 2014: 1) Peach Ombre; 2) Neon Yellow; 3) Alice; 4) Bright Purple; 5) French Triangle.
Be sure to also check out Elegant Touch’s new Candy Dip, available exclusively in store and online at Superdrug. You simple apply the sticky wrap to your nail, file of the excess and pop your finger in a range of glitters and voilà, sparkly nail perfection.
]]>Make Sure Your Nail Length is Right
This is something to do before your nail art—think of it for next time. Avoid nails that are too long. You may want them to stand out but that doesn’t mean they need to scratch and catch on everything.
If they catch, the polish is more likely to chip. The length will depend on the things you do—work at a computer, play an instrument etc.
Prepare Your Nails for the Nail Art
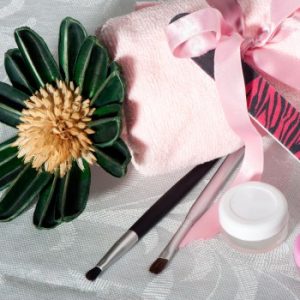
Get your nails ready for the art to be applied. This involves getting rid of all the nail polish from the last time and cleaning your nails thoroughly.
In a nail salon, you will find that the tops of your nails are buffered with an emery board. This is to roughen your nails to make it easier for the polish to stick. Do this and you will find your nail art lasting longer.
Keep Your Hands and Nails Moisturised
Look after the natural condition of your hands and nails with moisturiser. They remain soft and the cuticles are cared for, so the polish can attach better.
It is worth exfoliating your hands too, as this will remove all the dirt trapped in the cuticles and within the creases.
Always Remember About Your Top Coat!
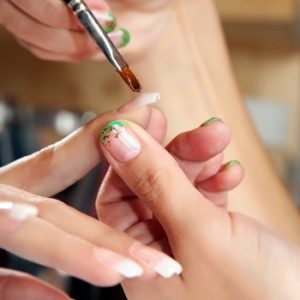
You may be in a rush after applying the delicate patterns but don’t let that mean you that stop you applying the top coat.
A top coat is really important for protecting the nail art from stains. It gives the extra layer for the elements to wear away and will keep your art looking shiny and new.
Allow Your Nails to Dry Properly
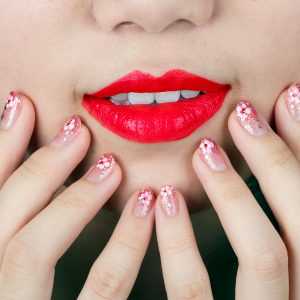
Don’t start doing things with your nails right after applying the art. Give them time to dry.
It can take as long as three hours for nail polish to dry properly, unless you have the heaters and fans that salons have.
Doing something before your nail art is fully dried, even if it’s just pulling your tights on, will make the art smear and look worn before you’ve gotten out of the house.
Protect Your Hands and Nails While Washing Up
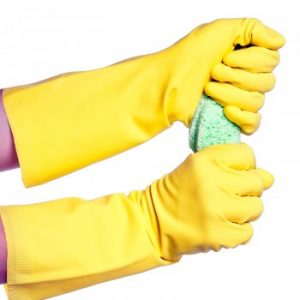
Rubber gloves will become your new best friend. Wear then whenever you are doing the washing up.
This protects your nails from chipping in the water; where your nails soften. You can easily catch your fingers on a chipped plate or edge of a sharp knife.
Use Icy Water to Harden the Polish

Make the polish harder so it sticks better by using icy water. You don’t need to hold your fingers in for long to gain the benefits.
Give your nails a chance to dry a little or it won’t work
]]>The Metallic Style
Metallic nails are extremely popular in 2013. Give it a try yourself without having to spend too much. There’s no need for nail polish, so no mess. All you need is a flexible polymer.
This is then applied to the nail while hot and takes the shape of your fingernails—or toenails if you want to try it there. You’ll instantly get an attractive and stand out look that everyone wants.
Photo: pxleyes.com
Get the Caviar Look
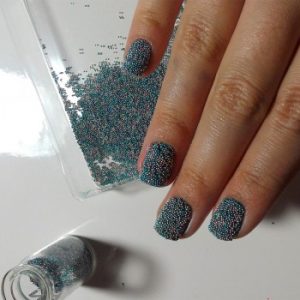
The caviar nail art will make your nails look like they’ve had lots of tiny candy balls attached to them but it’s super fun. This takes some time to get right and you will need patience but it’s all worth it in the end.
You will need to buy some tiny beads that are then stuck to the nail polish after application. You can stick as many or as few as you like.
Photo: nailartinc.blogspot.com
Furry Nails for a Softer Look
If you want to make your nails look soft and gently, you could make them furry. This is often done with crushed velvet but anything similar will work.
Like the beads for the caviar look, you’ll need to apply some nail polish and place the crushed velvet on while it is still wet.
It is then your choice as to whether you cover the whole nail or just part of it—and whether the velvet and polish are the same colours.
Photo: outcrowdfashion.files.wordpress.com
The Diagonal Glitter Look
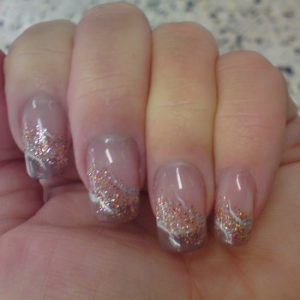
Go half and half with the diagonal glitter look. One half of your nail will need to remain plain—just try a glossy cover—and then the other half you just need to use glitter nail polish in your favourite colour.
It’s really simple and takes just a few minutes to finish. You’ll just need to wait for your nails to dry then.
Photo: dazzletips.co.uk
Fun with Polka Dots
Do a French manicure with a twist. Instead of doing it pink with white tips, consider leaving your nails a natural colour and have pink tips.
From there, you can add black and white dots over your nails. Of course, you can do this with any colour to suit your outfit and style.
Photo: katiebrandtdesign.com
Zebra Nail Tips
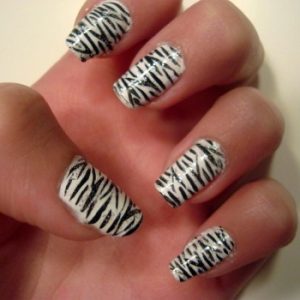
If you’re handy with a nail art brush or you have someone to help, why not try the zebra nail tips?
These are a fun way to spruce up your French manicure. You just need to add a few black stripes to your white tips to perfect the look.
Photo: beautythroughstrength.com
Turn Your Nails into Converse
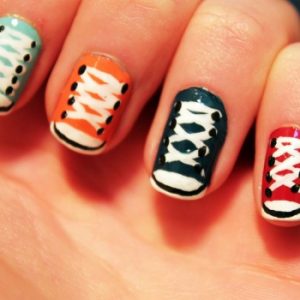
For those who love artistic challenges, try the converse nails. These are great in different colours and aren’t the hardest of nail art to do. It just takes some practise.
You’ll need to round your nails so they really look like a pair of converse.
Photo: youtube.com
]]>Bonjour!
Giving yourself a French-inspired manicure is easy with either tape (if you have square shaped nails) or hole punch reinforcing stickers (if you have round or oval shaped nails).
Paint your main color over your whole nail and let it dry completely. Now lay down tape or stickers as guides to get the perfect line or curve at the tip of your nails without making a mess!
Moon-Gazer
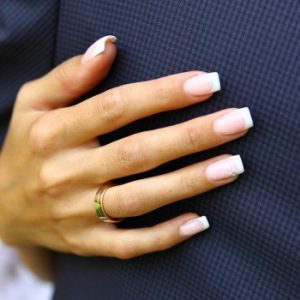
The half-moon mani is the French manicure’s edgy cousin, with crescents or half-circles of a contrasting color at the base of the nail, near the cuticle.
Paint your whole nail in the accent color (which will be the half moon when you’re done) and, when it’s totally dry, apply a hole-reinforcing sticker to form the shape of the half-moon.
Paint above that sticker only for the half-moon look.
Fierce Angles
Using the taping method described above, divide the nail in half at an angle and paint a contrasting shade over your dry base coat for a fun two-tone look.
With some creativity and patience (remember, your polish must be completely dry before putting down any tape) you can even have three or four different color stripes or triangles on your nails.
Hello, Sailor!
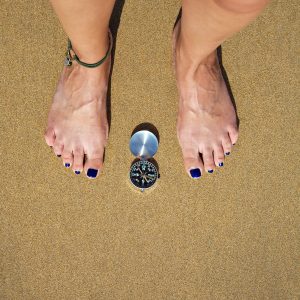
The Nautical look is in so pain your nails with a navy or dark blue base coat. Scotch tape is the DIY nail diva’s best friend, so paint a few inches of some tape with white polish and let it dry, too.
Now cut the painted tape into thin strips (18 or smaller) and lay them horizontally over your nails, using tweezers for a delicate touch. For a fun accent nail, you can try and freehand paint an anchor on one nail or the silhouette of a sailboat.
Everybody Polka
Dots are an easy and fun way to play with colors! You can even use the rounded tip of a bobby pin if you don’t want to buy a dotting tool.
Once your base coat is dry, apply dots of another color or colors for a cute look.
Blooming
Using those same dots and bobby pin dotting tool, you can form simple flowers on your nails.
One color dot in the middle and 4 or 5 petals on the outside make a cute flower.
Sparkling

Paint a base coat of a plain color.
Once that’s dry, add a coat or two of a glitter polish around the cuticles that becomes less dense toward the tips of your nails for a quick glitter gradient look!
]]>Take Your Own Polish
The nail salons need their polish to last over a long period of time for profit. To do this, they add thinners. While it stops the polish crystallising, it causes problems when added to your nails.
Instead, take your own nail polish with you and ask them to use that. They shouldn’t have a problem with it and you could end up saving some money.
Remove Moisture from the Nails
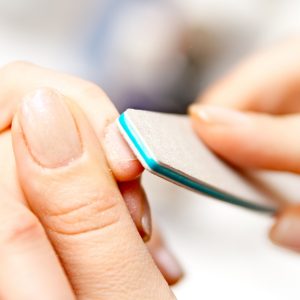
Moisture and oils stop the polish from sticking to the nail, leading it to chip quickly. Remove all the moisture possible before applying.
You can do this with lint-free pads. Most nail salons will understand the importance of this step to make the manicure last for over a week.
Encourage the Polish to Stick
There are two ways of doing this. The one most commonly used is by filing across the bed of the nails. This makes the nail rough so the polish can stick to it better.
The problem is that it causes a lot of damage to your nails. Instead, opt for a sticky base coat. You could take your own with you to make sure the technician will apply it.
Seal Your Polish
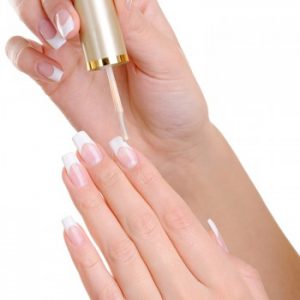
Apply the nail polish across the edge that has been filed or clipped. This helps to seal the polish in.
You should do this with all the coats you apply for maximum effect.
Smooth the Dents When they Happen
If you catch the nail polish when it’s still drying, it will create dents and bubbles. This damages the life of the manicure. Smooth them out as soon as they happen by applying a little cuticle oil on them.
If they happen in the nail salon, you may find that the technician uses some polish removed. This is a technical trick and should be left to those with the qualifications.
It Takes 12 Hours to Dry!
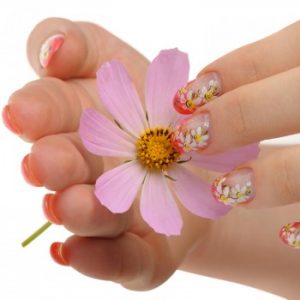
It may not seem like it but it can take up to 12 hours for nail polish to fully dry. During this time, you need to avoid as much heat as possible.
Try not to use the hair dryer, spend time out in the sun or even doing the washing up while you are waiting for this to happen.
The heat will stop the polish from sticking to the nails properly and shortens the life of your manicure.
Don’t Use Your Nails
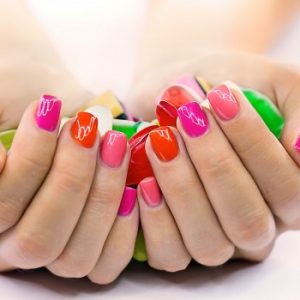
Your nails were not designed for opening cans or scratching things. Using your nails will not only chip your polish but damage your nails, making perfect manicures harder in the future.
Use your fingers for everything instead and if your nails get in the way, consider shortening them to make them more manageable.
]]>Long rounded shape
The shape trend for this season is long rounded almond shape fingernails to give your fingers a flattering look that stands out.
Rock star look

This is one shimmery style! Sparkly and glittery manicure is definitely in for this season. This rock star style is very popular this year, whether it is covering the full nail or just to finish off the manicure.
Another rock star style is the gel manicure, that are very popular since they do not require maintenance. You can get those in salons, if you are concerned about exposing your nails for UV lights, try using LED lights as it is safer.
You could protect your hands by wearing fingerless gloves or using lotion with high SPF.
Two Colors Manicure
Who said that you should have one color on your fingernails? Two colors manicure is in for this season and in different shapes.
Whether horizontal, vertical, diagonal or even in a triangular shape, you can mix two colors for a simple look with a great effect.
Depending on the shape you choose, you can use two shades of the same color, a glittery or sparkly color at the bottom of your nails or a brighter finish to give your nails a glow!
Mix and Match
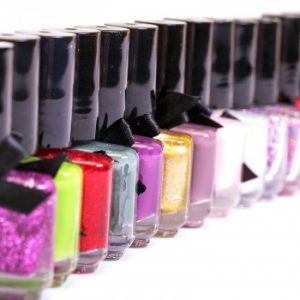
Mixing and matching colors is certainly the trend for this spring.
The most common form is using a different color usually much lighter or darker color depending on the colors you have on your nails on your ring finger.
Try a black ring finger with pink or baby blue nails. It is stylish, trendy and doesn’t blatantly break the rules.
Gold strips French Manicure?
Well, not exactly! It is common this spring to use a gold strip near the top of your finger nail instead of French manicure.
It is suitable to use with almost any color and it will give your nails a classy look.
Neon

For those of you who prefer a one color nail polish but still want a different edgy look, try neon.
Neon yellows, pinks and coral were big last summer and are certainly back in season this spring.
Pale Manicure
None of these options appeals to you? Would you rather hold on to the one color classic look?
This spring brings with it the pale colors, mainly white. This is a simple and elegant trend that will match with an outfit from any color you choose.
Tips for manicure

- Sit in a ventilated area as the fumes could be bad for your health
- Use nail polish remover, to clean leftover nail polish
- Shake the nail polish container before use
- Use a base coat
Get Your Work Space Ready
Many women think that a great manicure at home consists of nail polish remover, nail polish and a nail file. Save this quickie manicure for when you need to do your nails in a short amount of time.
For your professional looking manicure at home, you’re going to want to invest in a few tools.
You’ll want to have gentle hand soap, a nail file, cuticle tool, buffing tool, nail polish remover, cotton balls or pads, nail trimmers, nail cleaning tool, cuticle cream, a moisturizer, nail polish, base coat and a top coat. Set your tools out on a flat surface area.
Take Off the Old Polish
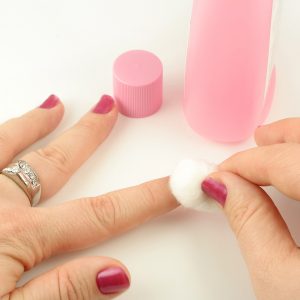
Wet your cotton balls or pads with your nail polish remover and take off any old nail polish. Be sure to get around the edges of your nails.
When you buy your nail polish remover, you can usually choose between acetone and non-acetone removers.
Acetone is usually inexpensive and gets the job done quickly. The downside is that it can dry out nails and the surrounding skin.
Non-acetone remover is less harsh but may take more effort in removing the old polish. Many have added moisturizers in them to keep nails soft and healthy.
It’s often a personal choice when a woman selects the nail polish remover that’s right for her.
Give Your Nails New Shape
Did you know that your nails have a natural grain to them? Try to file in one direction only when you’re shaping your nails.
This can help prevent chipping and peeling. You want to shape your nails into a rounded tip with a slightly flat top.
Clean them Up
If you paint dirty nails, you can tell. Clean out underneath your nails and then wash away any additional dirt and polish remover residue.
Take your time washing your hands. Softer cuticles are easier to handle.
Put On Cuticle Cream
Apply cuticle cream to your cuticles. The cream helps to keep the tissue healthy and also keeps bacteria out.
If you don’t have cuticle cream, you can substitute olive oil on your cuticles.
Put those Cuticles where they Belong
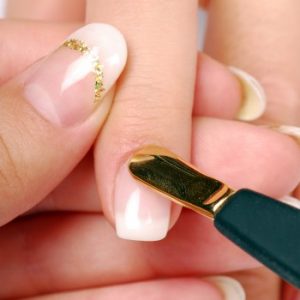
Use the cuticle stick to push your cuticles down to the base of the nail. Never cut your cuticles!
This can lead to infection or cuts. Once you’re done, moisturize your hands and wipe away any remaining oil residue.
Be a Nail-Buffer
Nail buffing shines up your nails almost as much as putting on a clear coat of polish.
It can also hide any nail flaws like discoloration or ridges.
Put on a Base Coat

Put the thinnest layer of a base coat on your nails.
Don’t put on a heavy layer and make sure it’s completely dry before moving onto the next step.
Apply Polish
Now you can have some fun seeing the finished product of your at-home manicure by putting on your nail polish (up to 3 layers).
You should be able to see the true color of your shade at this point. Allow each layer to dry before applying more.
Put on your Top Coat
Your top coat should be transparent and will help keep your nail polish from chipping. You can also apply an additional layer of top coat if necessary.
If you find the process of doing your own nails at home tedious, turn on music or watch television while you do them.
When you do your own manicure at home, you can relax and enjoy saving money while staying comfortable.
]]>How to Represent Your Personality
When you’re getting a new design on your nails you don’t necessarily have to follow the latest trends. You should feel free to do whatever makes you happy and whatever represents your personality.
We are all different and we all have cool designs we may love but if you’re looking for something trendy you may want to consider these options!
Styles That Are Hot Right Now

Right now there are a few trendy patterns that most women and teens go for and that’s the floral design.
It can be as detailed or as intricate as you’d like and you should feel free to use various colors that represent who you are! You’ve heard of the Bedazzler right?
You can do this for your nails as well. You can go with stickers or even fake jewels to create a trendy look.
What Your Nails Say About You?
You probably won’t be too surprised to know that your nails can say a lot about your personality without you even opening your mouth.
The color or the design can help describe the type of person you are and it can even show that you care about your appearance or you’re artsy and creative.
What Colors Work Best?
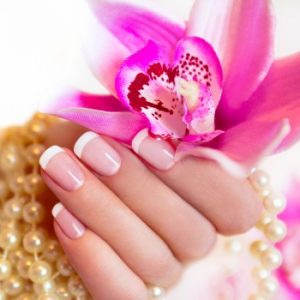
This is something that’s extremely personal and dependent on your personality.
You should go with colors that you like and ones that may match your clothing.
If you work in a professional setting you shouldn’t do anything that’s loud or that might draw attention to you.
Should You Create The Latest Trends Yourself?
This is a question that most women probably ask themselves often. Should you spend the money to get them done or do them yourself?
If you’re artsy then you can do them yourself and if you’re not you can test them out a few times to get the hang of how to do it.
Enlist the help of friends and even make a fun evening out of it with good wine, friends and laughter!
Where to Find Tips and Tricks?

- You can find tips and tricks on the internet. If you log on and do a quick search you should be able to come across quite a few cool and trendy designs.
- Ask your friends for advice. If they do their nails often they may have some tips and tricks for you.
- Pay attention at the salon. Watch what the stylist does the next time you get your nails done and try to keep a few ideas in mind.
Do the Trends Change Often?

Just like with everything else in life the nail trends will change from time to time. To stay current check out the Web or ask advice at the salon!
]]>


